Troubleshooting
Problem
This document explains how to use the Microsoft Excel Add-in data transfer upload option.
Resolving The Problem
| Important Note: This document discusses Client Access for Microsoft Windows 95 and Windows NT, Client Access Express, IBM iSeries Access, and IBM System i Access products. These names essentially refer to the same product; however, the functionality and name changed over the last several releases. For the purposes of this document, the terms Client Access, Client Access Express, iSeries Access, and System i Access can be used interchangeably. Where a difference is important, the version of the product is used to identify the differences. |
Starting with Client Access Express V5R1M0 a Microsoft Excel Add-In option for data transfer uploads was added to the client. Previous versions of the Client Access Data Transfer function provided the user with the ability to download data into an Excel spreadsheet. This function was integrated into Excel by providing the following:
| o | A iSeries Access toolbar icon/button the user can select to invoke a iSeries Access Data Transfer GUI |
| o | A menu option from the Excel Data pulldown menu called Transfer Data from iSeries |
| o | An Excel Add-in module called CWBTFXLA.XLL |
| o | An additional icon on the Excel toolbar |
| o | An additional menu option on the Excel Data pulldown menu called Transfer Data to iSeries |
| o | A new dialog, similar to the existing download dialog, that allows the user to input data used to define the upload |
| o | A new Excel Add-In module called CWBTFXLU.DLL |
The following screen shots were taken when using Excel 2003. Excel 2007 and Excel 2010 have a different interface when selecting the data transfer add-in. The data transfer add-in options can be found in Excel 2007/2010 on the Add-Ins tab. Once the desired data transfer add-in is selected, the rest of the screen shots in this document are very similar to what you will see when using Excel 2007/2010.
Accessing the Excel Add-in Upload Function
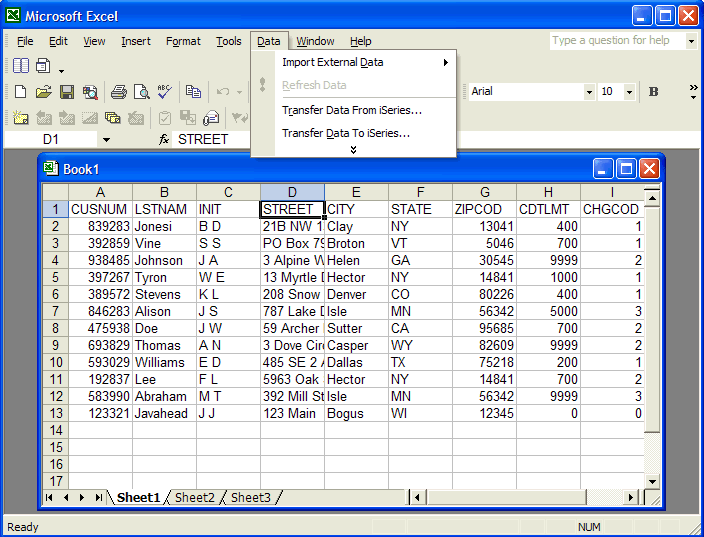
The Excel Data Transfer add-In Upload function can be accessed by selecting the Transfer Data icon on the Excel Toolbar or by choosing Transfer Data to iSeries from the Excel Data dropdown menu.
Excel Add-in Upload Options
Following is the initial dialog screen displayed after selecting Transfer Data to iSeries:
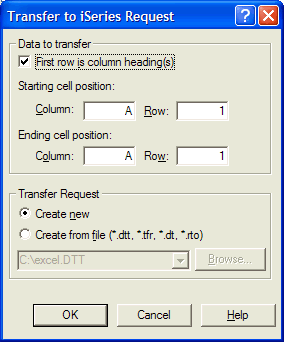
The following options are available when using the Excel Data Transfer add-in Upload GUI:
Note: The starting cell/ending cell information is not added nor updated to saved transfer requests. There is no plan in any future release to add this information to the saved transfer request.
| o | Starting cell position: A range of cells can be easily uploaded by highlighting the cells within a range before selecting the option to Transfer Data to iSeries. The starting and ending cell positions in the main upload dialog will be initially set to use the specified range. Note: Highlighting the cells may take a long time if the Excel spreadsheet is large. In this situation, it may be faster to specify the beginning and ending cell positions after selecting the option to Transfer Data to iSeries. |
| o | First row is column headings: The option can be checked if the first row is column headings. Note: Selecting First row is column heading(s) offers several important advantages. This allows you to transfer individual columns of data to the server database file. It also allows for differences in column order between the Excel spreadsheet and the server database file. In both cases, Data Transfer copies the data to the appropriate column in the database file based on the column headings in the Excel spreadsheet. |
| o | Create new: A user-specified range of cells can be uploaded to the IBM i system by stepping through a wizard that prompts the user for information used to define how the upload occurs. |
| o | Create from file: A user-specified range of cells can be uploaded to the IBM i system by specifying an existing saved transfer request. When using an existing transfer request, the following saved information is used: 1. FDF file. 2. The name of the IBM i database file that the spreadsheet data is to be uploaded to. Note: The host database file must exist or the upload fails with message CWBTF0040 even if the original saved transfer request was saved with the option to Create file and member. 3. Whether to Convert CCSID 65535 data. 4. Member/File text. |
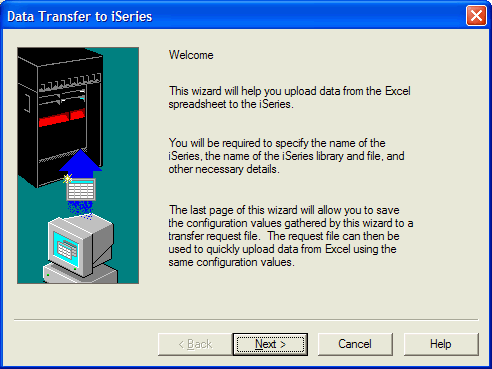
Click Next.
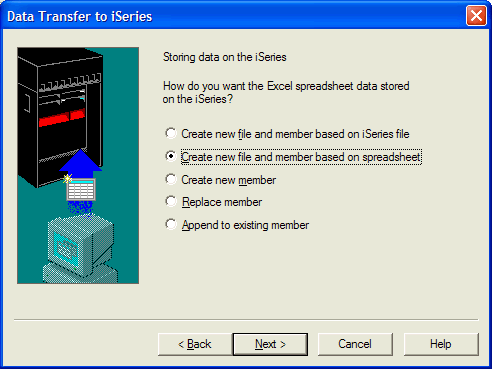
Select the option to Create new file and member based on spreadsheet, and click Next.
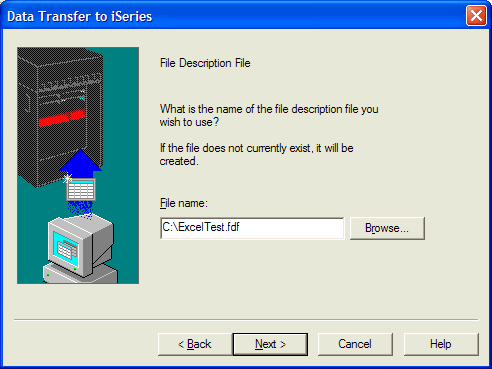
Specify an existing .FDF or the name (including path) of the new .FDF file to create.
The .FDF file is used during the data transfer upload process. If the upload is using the Create new option (from the spreadsheet wizard) and the .FDF file does not exist, the upload function dynamically builds the .FDF file based on the data within the cells selected for upload. If the user chooses any of the other upload options and the .FDF file does not exist, the layout of the existing IBM DB2 table is used to generate the .FDF file. In this scenario, an error occurs unless the data in the spreadsheet matches the layout of the DB2 table.
Notes:
| 1. | The upload function must scan all the cells selected for upload to check the type and size of the data within each cell before it can dynamically build the .FDF file. The scan can take some time to complete if a large range of cells have been selected for upload. |
| 2. | It is recommended that the data selected for upload contain the column headers when dynamically creating a .FDF file. This ensures that the .FDF file is created with the desired column headers. If the spreadsheet does not contain column headers, the .FDF file is created using default column headers: F1, F2, F3, and so on. This may cause uploads to fail because the improper column headers (F1, F2, F3, and so on) will be used for the upload, and they may not match the column headers in an existing DB2 file. |
| 3. | .FDF files created by the Excel Data Transfer add-in upload function are not capable of being used by the Data Transfer GUI and vice versa. This is because the .FDF file (the line that reads PCFT 18 in an .FDF file created by the Excel Add-in upload function) is associated with a unique file type (file type 18). This file type is not an option in the main Data Transfer interface. |
Because the .FDF file specified in the previous step (C:\ExcelTest.FDF) does not exist, it is dynamically created. Click Next from the previous dialog window to show the following dialog window.
The .FDF we specified does not exist; therefore, we are going to dynamically create our .FDF file.
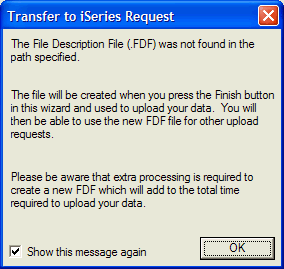
Click OK to go to the next dialog window.
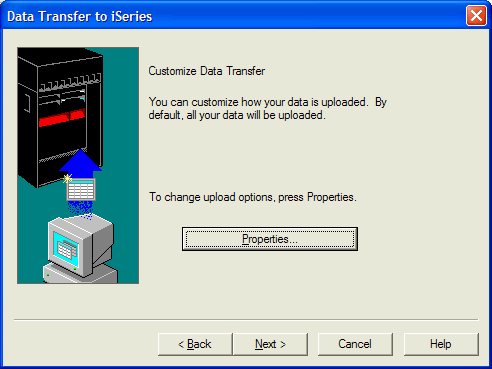
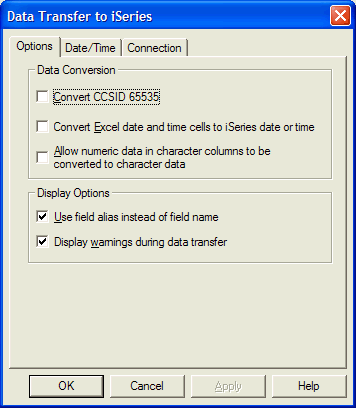
The following screen is shown when clicking on the Properties button. Clicking on each option in the Properties and then selecting F1 will display the help text for the selected Property.
Clicking on Next from the Customize Data Transfer screen will display the following screen:
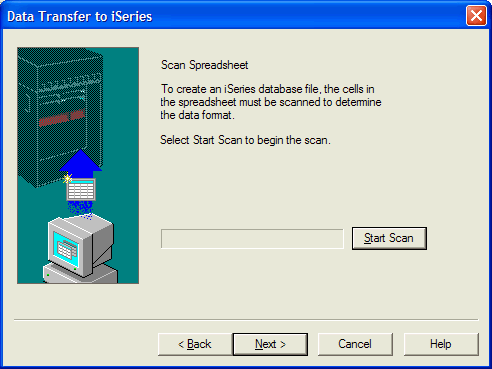
Click Start Scan to scan the cells in the spreadsheet.
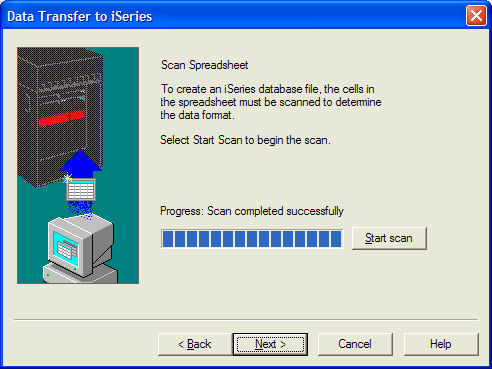
When the Progress line is complete and the GUI screen says Scan completed successfully, the scan of the spreadsheet has completed. Click Next to go to the following screen.
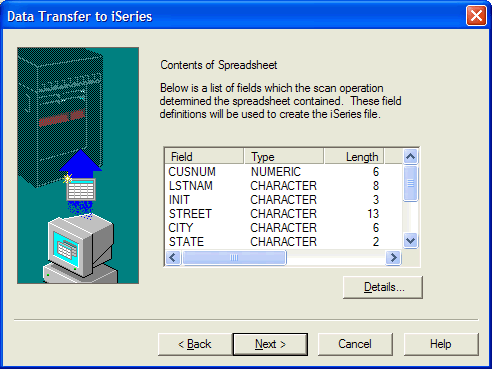
Highlight a field, and click Details to display the following screen:
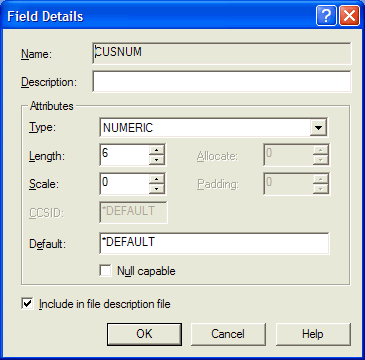
Edit the information shown on this screen, if necessary, and click OK. Repeat with other fields if necessary. When finished editing the fields (after clicking OK on the last field), click Next.
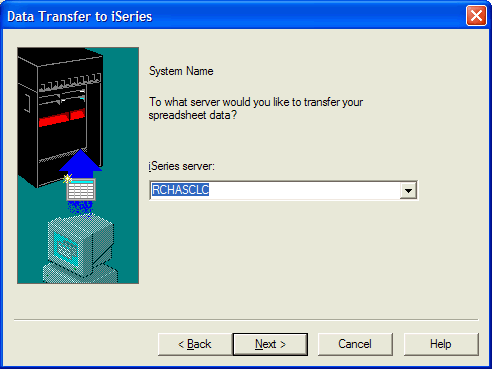
Select the IBM i system to transfer the spreadsheet data to, and click Next.
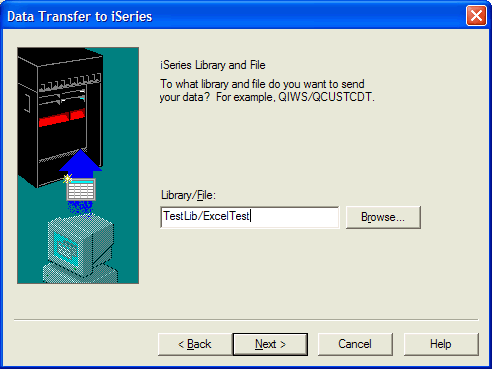
Specify the library and DB2 file name to upload data to. In the example, the library name is TestLib and the DB2 file name to be created is ExcelTest. Click Next.
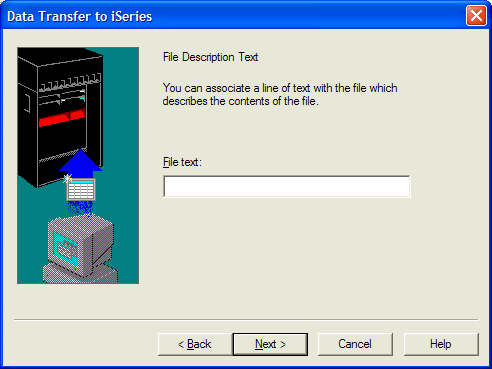
Enter optional text describing the file, and click Next.
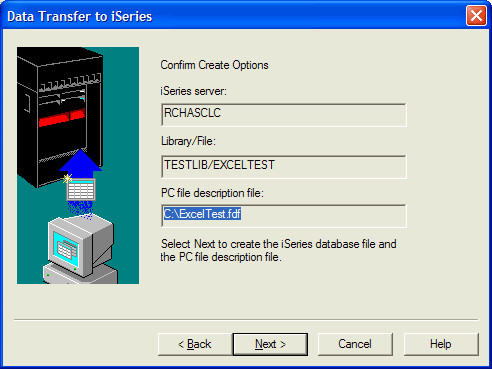
Confirm the options specified in the previous dialog windows, and click Next.
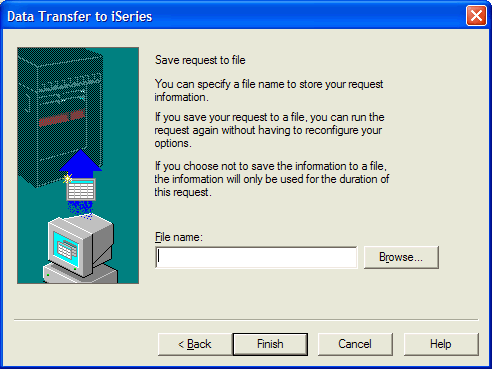
Specify a name to save the transfer request or leave the field blank if the transfer request should not be saved. Click Finish. The data from the spreadsheet will be uploaded to the specified System i system server database file.
Note: At the current code level, no completion message is displayed.
Excel Add-in Upload Considerations
Number of Column Headers
The number of columns selected for upload must match the number of columns in the database file being uploaded to if column headers are not part of the data selected for upload. Error message CWBTF0087 will be displayed if the number of columns do not match.
Partial Column Upload
The user can upload fewer columns than are defined in the database file if column headers are part of the data selected for upload. This works only if all of the selected column headers match a field name in the database file. Columns defined in the database file but not present in the spreadsheet selection, are set to default values.
Mixed Column Order
When column headings are part of the data selected for upload and the order of the columns does not match the layout defined in the database file, the data is uploaded to the correct columns based on the column headings.
CCSID 65535
Data sent to a database file with a CCSID of 65535 can be converted when using the Data Transfer Excel upload Add-In by selecting the option to Convert CCSID 65535 on the Properties screen. The default selection for this setting is off which is consistent with the Data Transfer GUI upload function.
Limitations/Restrictions
Merged Cells
Merged cells is a function of Excel that lets the user combine a range of cells into a single cell. The upload function does not support uploading a range of cells which contains merged cells. Error message CWBTF0090 is shown.
First Instance of Excel
When the first instance of Excel is started, it has exclusive hooks to the upload function. If a user opens a second or third instance of Excel and attempts to start the upload function, a message is shown telling them they need to invoke the upload function from the first instance of Excel. In this scenario, closing the first instance does not make the upload function available to the second or third instances. All Excel instances must be closed to make the upload function available again.
Note: The Excel Add-in has changed to a COM-based add-in starting with V6R1 System i Access for Windows. The data transfer add-in is no longer restricted to the first instance of Excel starting with the V6R1 client.
Excel 95
The Client Access Data Transfer Upload Add-In is not supported with Excel 95. An error message is shown if the upload function is selected when running Excel 95. Only Excel 97 and later versions are supported.
Historical Number
23102637
Was this topic helpful?
Document Information
Modified date:
18 December 2019
UID
nas8N1017388